You know those nights when you just want something simple, hearty, and downright comforting? That’s where my baked chicken legs and rice come in—my go-to, no-fuss dinner that never fails to hit the spot. I swear, there’s something magical about golden, crispy-skinned chicken legs nestled over fluffy rice, all cooked in one pan. No fancy techniques, no endless stirring—just pure, cozy goodness. It’s the dish I turn to when I’m short on time but still want something that tastes like I spent hours in the kitchen. Trust me, once you try this, it’ll become a regular in your rotation too.

Why You’ll Love This Baked Chicken Legs and Rice Recipe
Listen, I know we all need those reliable, no-stress recipes that somehow taste like a million bucks—and this one checks every box. Here’s why it’s a keeper:
- One-pan wonder: Less cleanup means more time to relax (or, let’s be real, scroll through your phone guilt-free). Everything cooks together in a single skillet—even the rice soaks up all those juicy chicken flavors.
- Weeknight hero: From fridge to table in under an hour? Yes, please. The oven does most of the work while you kick back.
- Crispy-meets-tender perfection: That golden chicken skin crackles just right, while the rice underneath turns out fluffy and rich, thanks to the broth and drippings.
- Forgiving flexibility: Out of paprika? Swap in smoked. Prefer thighs? Go for it. This recipe rolls with whatever you’ve got.
It’s the kind of dish that feels like a hug—simple, satisfying, and always delicious.
Ingredients for Baked Chicken Legs and Rice
Okay, let’s talk ingredients—because the right ones make all the difference here. I’ve made this dish a hundred times, and here’s exactly what you’ll need to nail it:
- 4 bone-in, skin-on chicken legs: Don’t even think about boneless or skinless here. That crispy skin and juicy meat? Non-negotiable. Plus, the bones add so much flavor to the rice.
- 1 cup long-grain rice (uncooked): I swear by jasmine or basmati for their fluffy texture, but plain long-grain works great too. Just don’t use instant—it turns to mush.
- 2 cups chicken broth: Low-sodium if you’re watching salt, but honestly, regular gives the rice that extra oomph. Homemade? Even better.
- 1 tbsp olive oil: For searing the chicken to golden perfection. You could use butter, but olive oil won’t burn as easily.
- The spice squad: 1 tsp each of salt, black pepper, paprika (smoked or sweet—your call), garlic powder, and onion powder. Simple, but trust me, they’re all you need.
That’s it! No fancy pantry raids required. Just grab these basics, and you’re halfway to dinner magic.
How to Make Baked Chicken Legs and Rice
Alright, let’s get cooking! This is where the magic happens—and I promise, it’s easier than you think. Just follow these steps, and you’ll have a dish that looks (and tastes) like you slaved over it for hours.
Step 1: Preheat and Season the Chicken
First things first: crank that oven to 375°F (190°C). While it heats up, pat those chicken legs dry with a paper towel—this helps the skin get extra crispy later. Now, grab your spices and mix them in a small bowl. Rub that blend all over the chicken, really working it under the skin too. (That’s my secret for maximum flavor!) Don’t be shy—every inch should be coated.
Step 2: Sear the Chicken Legs
Heat the olive oil in your trusty oven-safe skillet over medium heat. When it shimmers, add the chicken legs skin-side down. Listen for that glorious sizzle! Let them sear for 3-4 minutes until golden brown—resist the urge to poke at them. Flip and sear the other side too. This isn’t just for looks; that crispy skin locks in juices and builds deep flavor for the rice later.
Step 3: Prepare the Rice Base
Take the chicken out (it’s not done yet—just taking a quick break). Now, toss the rice right into that same skillet. Stir it around to coat with all the flavorful oil and chicken drippings. Pour in the broth—it should just cover the rice. Give it a quick stir to make sure no grains are sticking together. Now, nestle those gorgeous chicken legs right back on top, skin-side up. They’ll finish cooking while the rice absorbs all that goodness underneath.
Step 4: Bake and Finish
Cover the skillet tightly with foil—this traps steam to cook the rice perfectly. Slide it into the oven for 35 minutes. Then, remove the foil (careful—steam burns!) and bake for 10 more minutes to crisp up that skin. Finally—and this is crucial—let it rest for 5 minutes before serving. I know it’s tempting to dive right in, but those few minutes let the rice settle and the juices redistribute.

Tips for Perfect Baked Chicken Legs and Rice
After making this dish more times than I can count, I’ve picked up some tricks that’ll guarantee success every time. First, don’t skip the sear—that golden crust on the chicken adds insane flavor to the rice. Second, check your rice at the 30-minute mark—ovens vary, and you want it tender but not mushy. Oh, and handle that hot skillet like it’s lava—I’ve learned the hard way! Lastly, if your rice looks dry before baking, add a splash more broth. Trust me, these little things make all the difference between good and “wow, can you make this again tomorrow?”
Ingredient Substitutions and Variations
Look, I get it—sometimes you gotta work with what’s in the pantry, or maybe you’re just feeling adventurous. Here’s how you can mix things up without messing up this trusty recipe:
- Rice swap: Brown rice works great—just add an extra ½ cup broth and 10 minutes to the bake time. Wild rice blends? Go for it, but par-cook them first.
- Spice it your way: Swap paprika for chili powder if you like heat, or try thyme and rosemary for an herby twist.
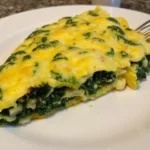
- Veggie boost: Toss in diced carrots or peas with the rice, or layer spinach under the chicken before baking.
- Chicken options: Thighs work beautifully here—just adjust cooking time if they’re bigger than your usual drumsticks.
The beauty? This dish welcomes all your creative tweaks—I’ve yet to find a combo that doesn’t taste amazing. For more dinner inspiration, check out our full collection of dinner recipes.
Serving Suggestions for Baked Chicken Legs and Rice
Now, let’s talk about turning this simple dish into a full-on meal! My favorite way? Pile that golden chicken and fluffy rice on plates and surround it with bright, fresh sides to balance the richness. A crisp green salad with lemon vinaigrette cuts right through, or go for garlicky sautéed spinach—it’s ready in minutes. If you’re feeling extra cozy, warm crusty bread on the side is perfect for soaking up every last bit of that flavorful rice. Honestly? Even just a squeeze of lemon over everything makes it sing.
Storage and Reheating Instructions
Good news—this dish keeps like a dream! Store leftovers in an airtight container in the fridge for up to 3 days. When reheating, sprinkle a tablespoon of water or broth over the rice to revive it. My trick? Warm it in the oven at 350°F for 10 minutes to keep that skin crispy. Microwaving works in a pinch—just cover with a damp paper towel to lock in moisture. Trust me, it’ll taste just as good as day one.
Nutritional Information for Baked Chicken Legs and Rice
Okay, let’s talk numbers—but remember, these are just estimates since ingredients can vary. One serving (that’s a juicy chicken leg with rice) comes in around 450 calories, with 30g protein to keep you full and 40g carbs for energy. The rice soaks up all that flavorful broth, so you’re getting 600mg sodium—use low-sodium broth if you’re watching that. And hey, that crispy skin? That’s where most of the 18g fat comes from, but it’s totally worth it for the flavor. As always, your mileage may vary based on exact ingredients! If you enjoy this style of cooking, you might also like our one pot creamy garlic parmesan chicken.
Frequently Asked Questions About Baked Chicken Legs and Rice
I’ve gotten so many questions about this recipe over the years—here are the ones that pop up most often (and my tried-and-true answers!):
Can I use chicken thighs instead of legs?
Absolutely! Thighs work beautifully—just keep an eye on the bake time since they’re often thicker. If they’re huge, you might need an extra 5-10 minutes. The skin still gets gloriously crispy, and the meat stays juicy.
Why is my rice still crunchy?
Ah, the dreaded undercooked rice! Usually, it means your broth didn’t fully cover the rice before baking. Next time, press down gently on the rice with a spoon—it should be submerged. If you’re mid-bake and notice dryness, add a splash of hot broth and cover tightly again.
Can I make this ahead?
You bet! Assemble everything up to the baking step, cover, and refrigerate for up to 24 hours. Just add 5-10 minutes to the bake time since it’s starting cold. The rice might even absorb more flavor! For more recipe ideas, follow us on Pinterest.
Help—my chicken skin isn’t crispy!
Two tricks: First, make sure you pat the chicken bone-dry before seasoning. Second, that final uncovered bake is crucial—if the skin’s still soft, pop it under the broiler for 2 minutes (watch closely!).